I was given copies of Seriously Good Freezer Meals: 150 Easy Recipes to Save Your Time, Money & Sanity by Karrie Truman ©2017 www.robertrose.ca to review and giveaway for the blog tour. All opinions are my own.
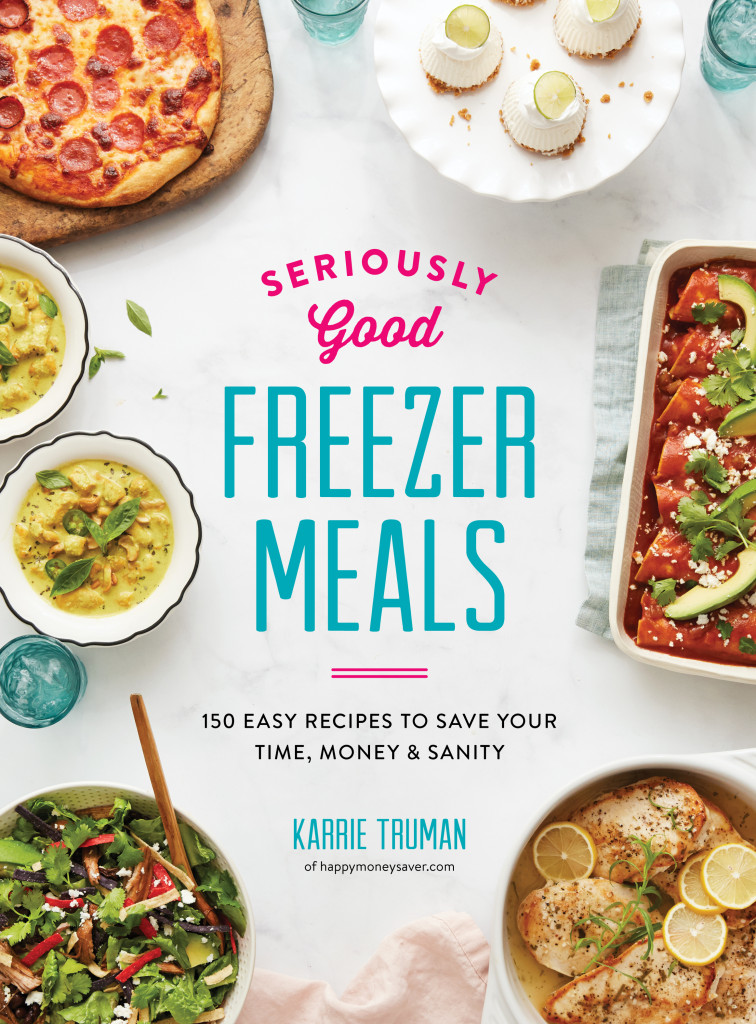
Courtesy of Seriously Good Freezer Meals: 150 Easy Recipes to Save Your Time, Money & Sanity by Karrie Truman © 2017 www.robertrose.ca Available where books are sold.
Image credit: Charity Burggraaf
I’m so excited to be a part of Karrie Truman’s Seriously Good Freezer Meals: 150 Easy Recipes to Save Your Time, Money & Sanity blog tour!
In her new book, Karrie Truman takes on the misconceptions of freezer meals and offers recipes, techniques and tips to get you started.
Here’s some tips from the book:
Decide how much time you want to spend on making freezer meals. Some suggestions include doubling meals and freezing some portions.
Try group swaps for exciting new to you meals.
Consider your portions and have the right containers ready and labeled.
Here are some of her recipes to get you started.
Page down to the Rafflecopter and enter to win your own copy of Seriously Good Freezer Meals: 150 Easy Recipes to Save Your Time, Money & Sanity by Karrie Truman.
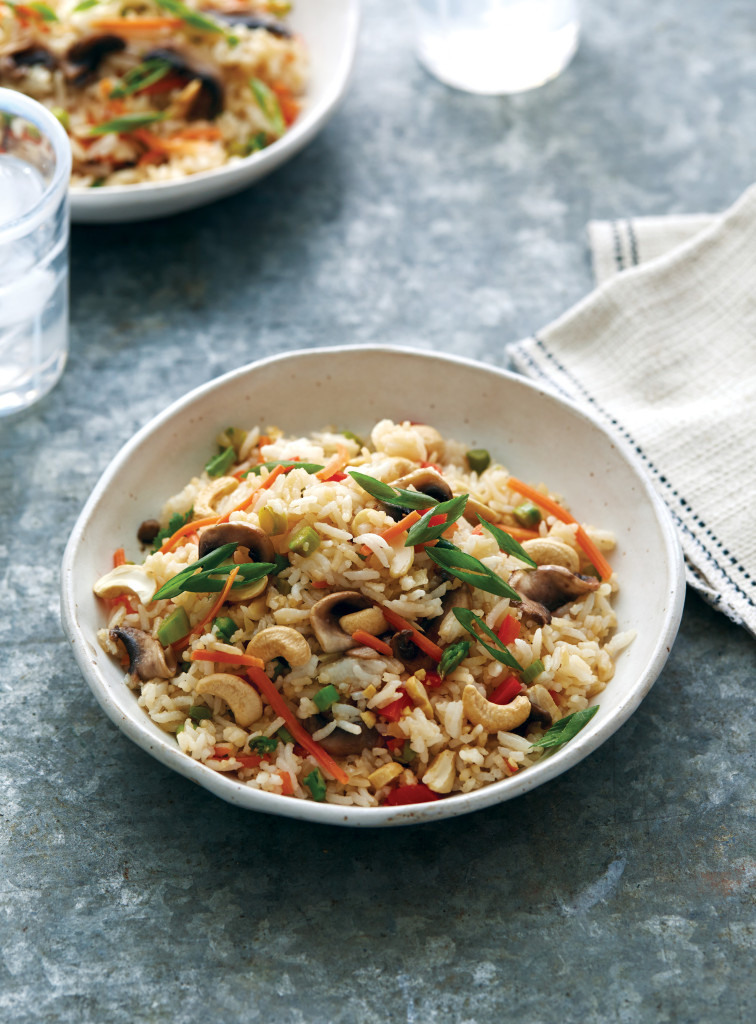
Recipe and photo courtesy of Seriously Good Freezer Meals: 150 Easy Recipes to Save Your Time, Money & Sanity by Karrie Truman © 2017 www.robertrose.ca Available where books are sold.
Image credit: Charity Burggraaf
Cashew Mushroom Fried Rice
Here it is — my favorite homemade fried rice recipe. This is a pleasant blend of savory mushrooms, filling rice, flavorful vegetables and crunchy cashews. Confession: I often make this recipe without mushrooms because I’m the picky eater in my family! Don’t worry, though; it’s still as delicious. Makes 6 servings.
2 cups (500 mL) long-grain brown rice
3 cups (750 mL) water
2 tbsp (30 mL) olive oil
6 white mushrooms, thinly sliced
1/2 cup (125 mL) shredded carrot
11/2 cups (375 mL) thinly sliced, trimmed asparagus
1 red bell pepper, diced
1/2 onion, puréed or diced
2 tsp (10 mL) minced garlic
1 cup (250 mL) halved raw cashews
2 tbsp (30 mL) tamari sauce
Freshly ground black pepper
Garnish
Chopped green onions (optional)
- Place rice in a strainer and rinse under cool water until water runs clear. In a small saucepan, combine rice and water. Bring to a boil over high heat. Immediately reduce heat to low, cover and simmer for 35 to 40 minutes, until rice is tender and water is absorbed. Remove from heat and let stand, covered, for 10 minutes longer. Fluff with a fork. Set aside to cool.
- In a large wok or skillet, heat olive oil over high heat. Once it is smoking, add mushrooms and cook, stirring, for 2 to 3 minutes, until evenly browned. Add carrot, asparagus, bell pepper, onion, garlic and cashews; cook, stirring, for 2 minutes, until vegetables are tender.
- Add rice and stir constantly for 1 to 2 minutes, separating any clumps, until well combined and heated through. Add tamari sauce, sprinkle with pepper to taste, and stir to combine.
Make It Now Serve sprinkled with green onions, if using.
Make It a Freezer Meal Let fried rice cool completely. Transfer to a gallon-size (4 L) freezer bag. Seal, removing as much air as possible, and freeze.
Reheat Place bag in the refrigerator for at least 12 hours or up to 24 hours to thaw. Transfer contents to a large, microwave-safe bowl and cover with plastic wrap. Microwave on High for 5 to 6 minutes, stirring once a minute, until heated through. Serve sprinkled with green onions, if using.
…
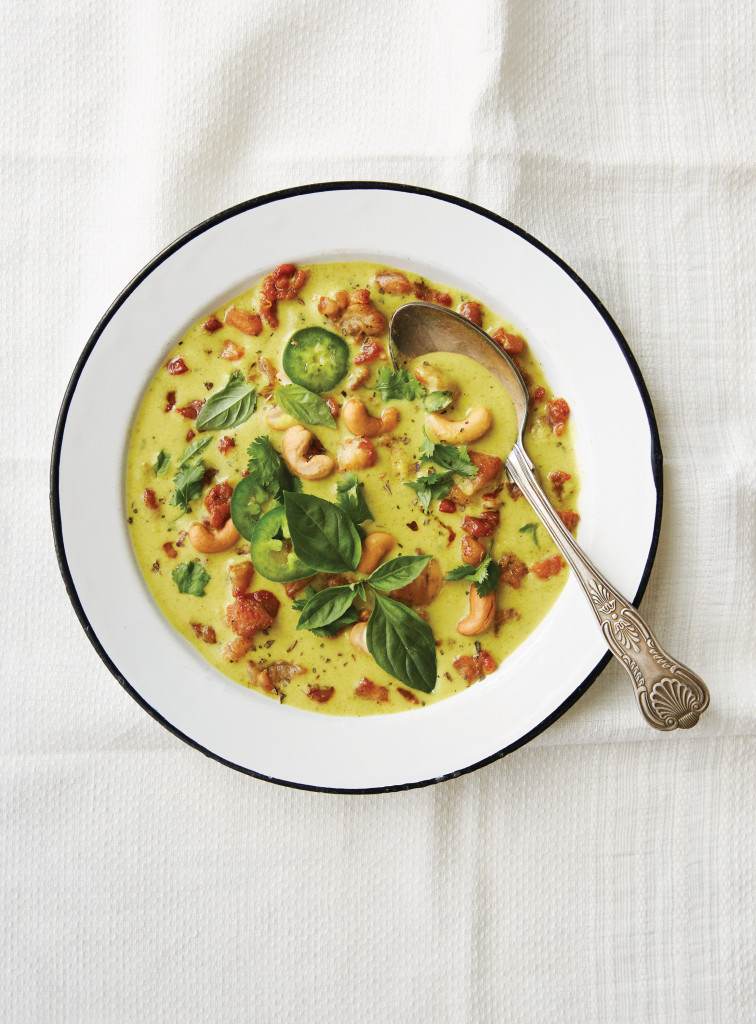
Recipe and photo courtesy of Seriously Good Freezer Meals: 150 Easy Recipes to Save Your Time, Money & Sanity by Karrie Truman © 2017 www.robertrose.ca Available where books are sold.
Image credit: Charity Burggraaf
Coconut Cashew Basil Curry Soup
One of my most requested recipes from family and friends is this coconut cashew curry soup. You will love the rich taste, deep flavors and crunch of the salty cashews.
Makes 6 servings
2 lbs (1 kg) boneless, skinless chicken breasts, diced
1/2 tsp (2 mL) garlic salt
2 tbsp (30 mL) vegetable oil
1 onion, quartered
1 tbsp (15 mL) minced garlic
1 tsp (5 mL) minced or grated fresh ginger
1/2 jalapeño pepper
2 cans (each 14 oz/398 mL) coconut milk
2 cups (500 mL) chicken broth or Homemade Chicken Stock (page 349)
2 tbsp (30 mL) curry powder
1 tsp (5 mL) salt
1/4 tsp (1 mL) freshly ground black pepper
11/2 tsp (7 mL) dried basil
1/2 cup (125 mL) salted roasted cashews
Garnishes
Chopped fresh cilantro (optional)
Small fresh basil leaves (optional)
Sliced jalapeño pepper (optional)
- Sprinkle chicken with garlic salt. In a large wok or skillet over high heat, heat vegetable oil until smoking. Working in batches, add chicken and cook for 3 to 4 minutes, stirring constantly, until no longer pink inside and slightly crispy on one or two edges. Using a slotted spoon, transfer chicken to a bowl and set aside.
- In a blender or food processor, combine onion, garlic, ginger and jalapeño; blend on High until smooth. Add coconut milk, chicken broth, curry powder, salt and pepper; blend until smooth.
Make It Now In a large saucepan, combine chicken and any accumulated juices, coconut milk mixture and dried basil. Bring to a boil over medium-high heat. Immediately reduce heat to low and simmer for 15 minutes to deepen flavors. Remove from heat. Ladle into bowls and top with cashews, plus cilantro, fresh basil and jalapeño, if using.
Make It a Freezer Meal Let chicken cool completely. Pour chicken, coconut milk mixture and dried basil into a labeled gallon-size (4 L) freezer bag. Seal, removing as much air as possible, and freeze. Place cashews in a quart-size (1 L) freezer bag and seal. Place both bags in another gallon bag and seal together.
Thaw and Cook Place soup in refrigerator for at least 12 hours or up to 24 hours to thaw, or run lukewarm water over bag until you can break soup apart. Pour bag contents into a large saucepan and bring to a boil over medium-high heat. Immediately reduce heat to low and simmer for 15 minutes to deepen flavors. Remove from heat. Ladle into bowls and top with cashews, plus cilantro, fresh basil and jalapeño, if using.
…
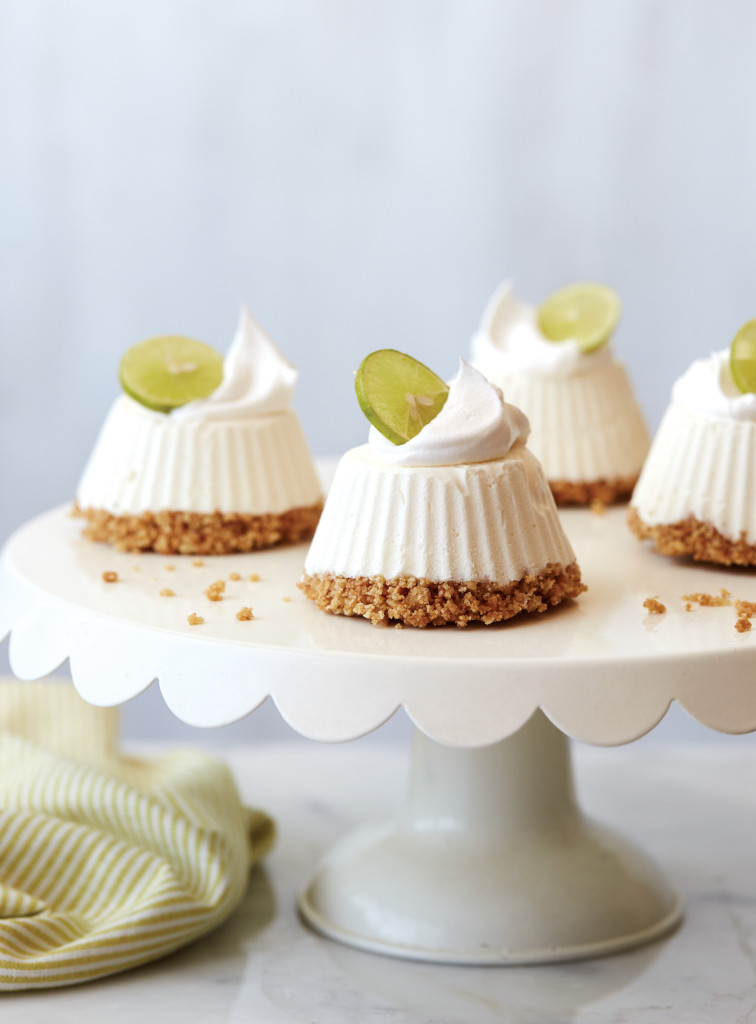
Recipe and photo courtesy of Seriously Good Freezer Meals: 150 Easy Recipes to Save Your Time, Money & Sanity by Karrie Truman © 2017 www.robertrose.ca Available where books are sold.
Image credit: Charity Burggraaf
Mascarpone Key Lime Mini Pies
These mini pies are truly my biggest addiction. The refreshing light, sweet flavor of Key limes and the creamy, airy mascarpone are the obvious stars, but the real surprise lies in the unique taste of cardamom in the graham cracker crust. It’s a magical combination! Makes about 12 mini pies.
Filling
8 oz (250 g) mascarpone cheese, softened
1 can (14 oz or 300 mL) sweetened condensed milk
3/4 cup (175 mL) freshly squeezed or bottled Key lime juice
2 cups (500 mL) frozen whipped topping (Cool Whip), about 6 oz/175 g
Crust
11/4 cups (310 mL) graham cracker crumbs (about 41/2 oz/130 g)
1/4 cup (60 mL) butter, melted
1/2 tsp (2 mL) ground cardamom or ground cinnamon
Garnishes
Additional frozen whipped topping (Cool Whip), optional
Sliced Key limes (optional)
- Filling: In the bowl of a stand mixer (or in a medium bowl, using an electric hand mixer), beat mascarpone cheese on High for about 1 minute, until creamy. Add condensed milk and lime juice; beat on Medium for about 1 minute, until smooth. Gently fold in whipped topping, until blended.
- Place 12 silicone muffin liners in a 12-cup muffin tin. Scoop mixture into cups until three-quarters full.
- Crust: In a medium bowl, combine graham cracker crumbs, melted butter and cardamom, stirring well.
- Sprinkle crust mixture evenly over each mini pie. Press gently with the back of a spoon to flatten. Freeze for about 2 hours, until firm.
Make It Now Remove from freezer. Gently remove silicone liners and invert mini pies onto a serving plate, crust side down. Top with additional whipped topping and a slice of Key lime, if using. Serve frozen.
Make It a Freezer Meal Remove from freezer. Transfer mini pies, in their silicone liners, to 2 labeled gallon-size (4 L) freezer bags. Seal, removing as much air as possible, and freeze.
Serve Remove from freezer. Gently remove silicone liners and invert mini pies onto a serving plate, crust side down. Top with additional whipped topping and a slice of Key lime, if using. Serve frozen.
a Rafflecopter giveaway
Like this:
Like Loading...


 The Sunday Supper Movement is committed to bringing our readers delicious recipes that encourage them to gather and eat together around the family table. Search for your favorite ingredients on our Sunday Supper website. Also check out the Sunday Supper Pinterest boards for plenty more ideas and inspiration.