Clorox Scrubmate review and #giveaway

I was given a Clorox ScrubMate Combo Pack to review and one to giveaway. I received no further compensation. All opinions are my own.

Clorox Scrubmate – The Ultimate Kitchen Cleaning Tool
ScrubMate
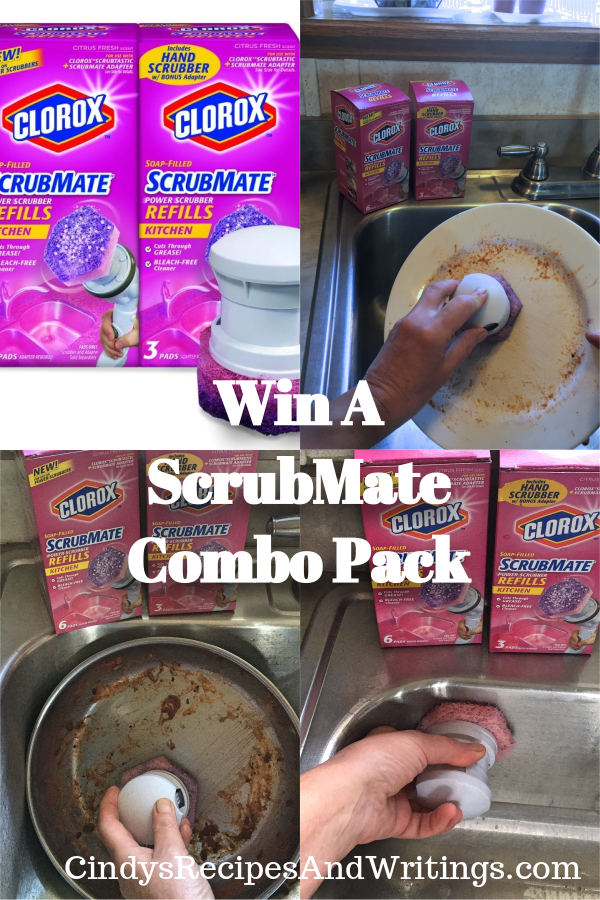
Clorox Scrubmate is a new, disposable soap-filled kitchen scrubber that takes the elbow grease out of cleaning tough kitchen messes. Featuring scrubbing fibers and powerful soap built in, the Scrubmate pad easily cleans dishes and pans covered in baked-on food, as well as greasy countertop and appliance spills, leaving a fresh citrus scent. The innovative adaptor cap allows for comfortable scrubbing by hand or easy attachment to all leading power scrubbers. When the mess is gone, the pad ejects into the garbage for quick, hands-free disposal.

To use with power scrubbers, the cap is removed from the adaptor, which then easily connects with the Clorox Scrubtastic, Clorox Scrubtastic Max, and most power scrubber brands.

Safe to use on most glass dishware, metal cookware – including non-stick pots and pans, granite* and marble counters, tile, grout, *wood and more, it is the ultimate kitchen cleaning tool.

*Always test the scrubber in a small inconspicuous surface area to make sure it is compatible with area being cleaned.

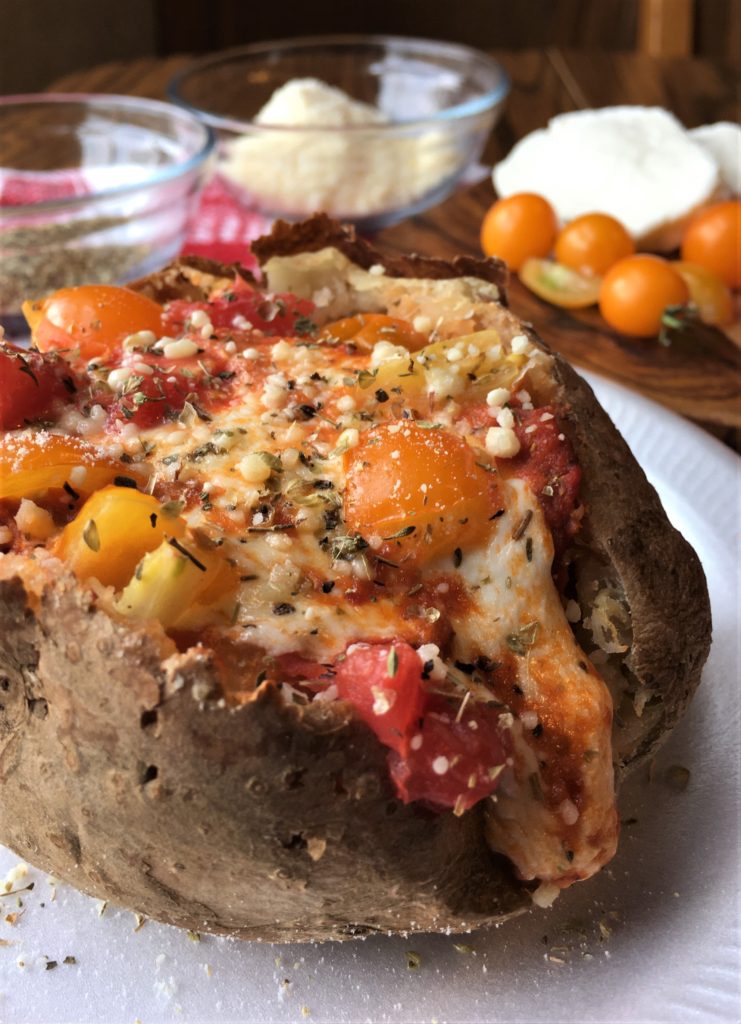
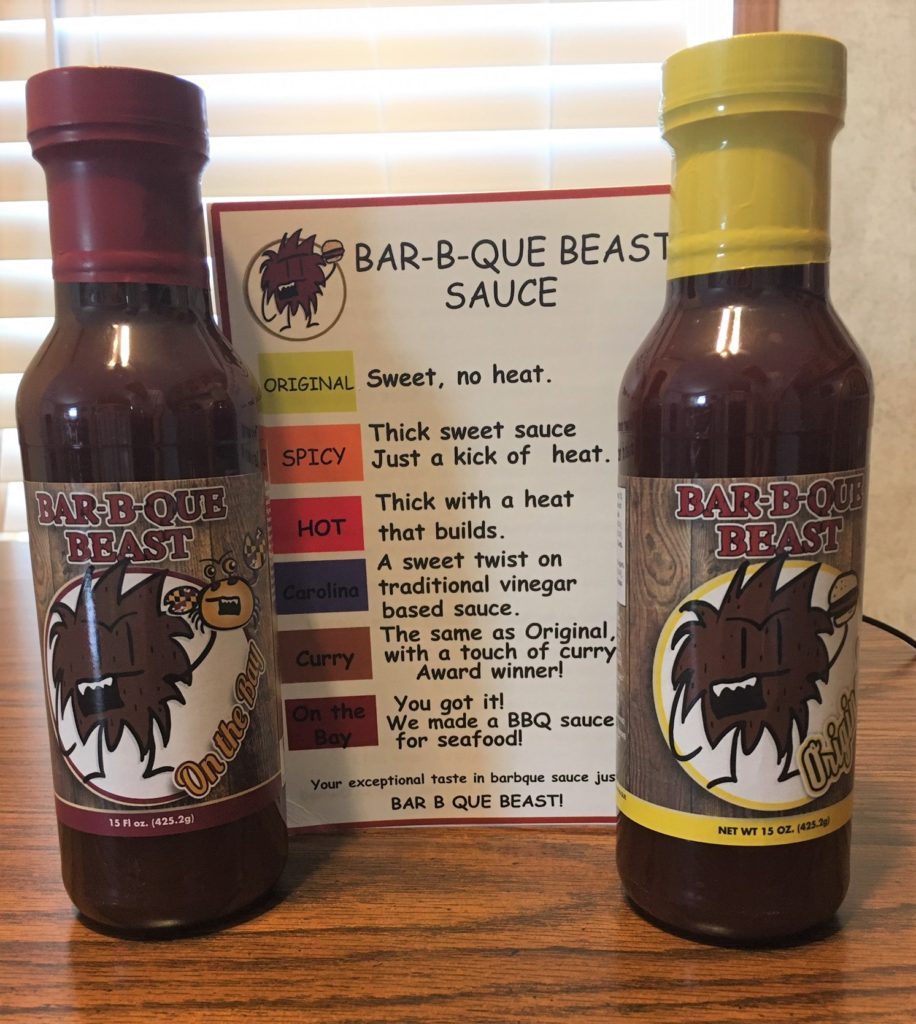
I put the ScrubMate to the test on overnight dried on spaghetti sauce.

It easily cleaned my fry pan, plates and even got into the nooks and crannies of my tongs. Dishes done, I scrubbed the sink.

Easy to rinse out too!

Enter to win a combo pack today!

ScrubMate

Retailer availability: Clorox Scrubmate scrubbing pads and adaptor are available from Amazon and Walmart.com in various pack sizes. Clorox Scrubmate pads are also available for Bath & Tile.

a Rafflecopter giveaway

Facebook Pinterest Disclaimer: Entrants should understand that they are providing their information to the Sponsor and not to Facebook. This promotion is in no way sponsored, endorsed or administered by, or associated with Facebook or Pinterest.

Posted in What's For Dinner? | 8 Comments

Pizza Style Baked Potatoes #OurFamilyTable

Pizza Style Baked Potatoes served fluffy bakers topped with fresh mozzarella, pizza sauce and more! A tasty twist for pizza lovers and baked potato fans!
Pizza Style Baked Potatoes

This week our food loving group is celebrating potatoes!

National Potato Day is August 19. It’s such a humble thing, the potato. It goes with almost anything, is super budget friendly, and packs a nutrient punch. So, let’s make the potato the star of this show!

Thanks Christie from A Kitchen Hoor’s Adventures and Ellen from Family Around the Table for hosting our event!

I have to admit I love baked potatoes with all kinds of toppings. Traditional cheese, sour cream, bacon, and green onions works when I’m out or at a toppings bar. At home I like to try something different.
Chili is a good topping. Broccoli and cheddar works well too.
Today I’m in the mood for pizza!
Pizza Style Baked Potatoes

These Pizza Style Baked Potatoes show off gooey fresh mozzarella and colorful chopped fresh tomatoes. You can use homemade pizza sauce or your favorite jarred sauce.

Here’s an easy pizza sauce:

  • 1 28-ounce can crushed plum tomatoes
  • 1/4 cup finely diced onion
  • 2 tablespoons minced garlic
  • 1 tablespoon dried oregano
  • salt and pepper to taste

Bring sauce to a boil in a medium-sized saucepan. Reduce heat and simmer until onions and garlic are soften. Cool mixture then pulse in blender until smooth.
The key to serving fluffy baked potatoes is in how you pierce the skin. Use a fork and pierce the top lengthwise down the middle of a hot potato. Next, pierce the top horizontally at about 1.2-inch intervals. Gently squeeze and the inside should “pop” into a fluffy center.
Add your toppings and enjoy!

Pizza Style Baked Potatoes

Servings 2 each

Ingredients
  

  • 2 Idaho Russet Potatoes medium-sized
  • 1/2 cup pizza sauce
  • 4 each fresh mozzarella slices
  • 1/4 cup chopped fresh tomatoes
  • 2 tsp grated Parmesan cheese
  • 1 tsp dried oregano

Instructions
 

  • Preheat oven to 350 degrees. Place washed potatoes on a foil sheet placed directly on the oven rack. Roast potatoes for approximately 1 1/2 hours or until soft and indent when lightly squeezed.
  • Using a fork, pierce the potatoes lengthwise down the center and horizontally across the top at about 1/2-inch intervals. Squeeze the potato until the filling, "pops" up fluffy.
  • Spoon about 2 tablespoons of pizza sauce on top each potato. Add mozzarella, tomatoes, and Parmesan. Broil for about 2 minutes to melt cheese. Sprinkle with oregano.

Positively Perfect Potatoes

We share Recipes From Our Dinner Table! Join our group and share your recipes, too! While you’re at it, join our Pinterest board, too!

Posted in pizza, potatoes, What's For Dinner? | 17 Comments

Stuffed Pesto Wagyu Burger

I received a sample of Vermont Wagyu Beef burger from Spring-Rock Farm in exchange for a review. All opinions are my own.
Stuffed Pesto Wagyu Burger

Stuffed Pesto Wagyu Burger serves tender wagyu beef burger meat mixed with pesto and roasted red peppers. Gooey cheddar oozes from the burger’s center, Juicy Lucy style!

Summer and grilling go hand in hand. Burgers are always a favorite way to get my grill on. What I love about burgers is their versatility.
You can season the meat with different spices or top your burger with endless combinations. One thing I do insist on is cheese. Sometimes a slice of American melted on top works. Other times, cheese gets stuffed inside, juicy lucy style.
Stuffed Pesto Wagyu Burger

No matter how you like your burger one thing is a must.
Start with good, quality beef.
For my Stuffed Pesto Wagyu Burger I’m using Vermont Wagyu. You never heard of Wagyu beef? Here’s a bit about it.

About Vermont Wagyu

Vermont Wagyu, a purveyor of all natural, 100% full-blood Wagyu beef, is now shipping its beyond prime grade beef direct to households throughout the U.S. via its website: vermontwagyu.com.
Vermont Wagyu is full-blood naturally-raised Wagyu. The Vermont Wagyu family-owned farm incorporates 350 acres, where founder Dr. Sheila Patinkin and her family raise Wagyu with an old-fashioned commitment to the land and a healthy environment.
“Our commitment is to offer customers naturally raised 100% full-blood Wagyu beef with no added growth hormones or steroids. Our cattle are primarily grass fed and they make it beyond prime grade 100% of the time. All this produces a healthy beef with a melt-in-your mouth texture that’s hard to find anywhere else in the American Northeast,” said Vermont Wagyu owner and founder Dr. Sheila Patinkin, who personally oversees the farm’s breeding genetics program. “We also package and send each order direct from the farm. Customers have the comfort of knowing that their food is coming directly from our family to yours.”
For more information, please visit www.vermontwagyu.com or follow Vermont Wagyu on social media at http://www.instagram.com and http://www.facebook.com/vermontwagyu/.

Stuffed Pesto Wagyu Burger

Stuffed Pesto Wagyu Burger

Adding pesto directly into the burger meat patty makes it so much better. I like to make my own pesto. The pesto recipe is included here. You can use store bought too if you like.
Diced roasted red peppers also go into the burger. So good!
Cube the cheddar into about 1/2-inch size. I use about an ounce of cheese per 4 ounce burger patty. Remember to center the cheese and gently fold the meat sides up and pinch shut.
Grill about 4 minutes per side until internal temperature reaches 160 degrees. Cheese will be melted when cut!

Of course you will want to take a bit of the garlicky pesto and mix it with some mayo to spread on top. Add a slice of roasted red pepper and serve on a toasted onion roll! Enjoy!

Stuffed Pesto Wagyu Burger

Prep Time 15 minutes
Cook Time 10 minutes
Total Time 25 minutes
Servings 4 burgers

Ingredients
  

  • 1 lb ground beef (I used Vermont Wagyu)
  • Pesto
  • 1 cup fresh basil leaves, packed
  • 2 cloves garlic
  • 1/4 cup grated Parmesan
  • 1/8 tsp black pepper
  • 3 tbsp olive oil
  • 2 tbsp chopped roasted red peppers
  • 4 ounces cheddar cheese, cubed
  • 1/2 tsp salt, optional

Instructions
 

  • Make Pesto. Place basil and garlic in a food processor. Grind until well chopped. Add Parmesan and black pepper. Pulse to create a loose paste.
    With food processor running, slowly add olive oil until a firm paste forms.
  • Mix together Wagyu beef, red peppers, and 1/4 cup pesto paste. Form mixture into 4 balls. Flatten each into a patty.
  • Place 1 ounce of cheese cubes on center of patty. Fold up the sides and pinch shut. Place patties on a medium-high heat grill or griddle pan. Cook for 4 to 5 minutes per side until internal temperature reaches 160 degrees. Serve on a toasted roll with a slice of roasted red pepper and pesto mayo if desired. (make pesto mayo ratio: 1 tsp pesto per 1/4 cup mayo.
Posted in beef, burger, grill, ground beef, What's For Dinner? | Tagged , | Comments Off on Stuffed Pesto Wagyu Burger

Barbecue Seafood Skewers


I received sample sauces from Bar-B-Que Beast in exchange for a review and recipe post. I received no further compensation. All opinions are my own.

Barbecue Seafood Skewers serve shrimp, salmon and veggies in a slightly spicy, delicious Bar-B-Que Beast Old Bay barbecue sauce glaze. Time to #FeedYourBeast !

Barbecue Seafood Skewers

It’s grilling season and often seafood gets passed by as a barbecue choice for steaks and chicken. I do like those meats but not every time I grill.

Shrimp and salmon make excellent barbecue skewers with a few veggies in between.

Barbecue Seafood Skewers

Part of making barbecuing seafood is choosing the right sauce. Bar-B-Que Beast created a sauce with Old Bay that worked great!

bar b-que beast sauce

Connect with Bar-B-Que Beast on social media:

Bar-b-que beast is running a sale on all their sauces until Saturday, August 15th! Visit their Website to get yours!

Barbecue Seafood Skewers

Ingredients
  

  • 1/4 lb shrimp, raw, large peeled and deveined
  • 1/2 lb salmon filet, skinned cut into 1-inch pieces
  • 1 bell pepper cut into 1-inch pieces
  • red onion cut into 1-inch pieces
  • 1/2 lb cherry tomatoes
  • 1/2 cup barbecue sauce I used Bar-B-Que Beast On the Bay Sauce

Instructions
 

  • Thread skewers alternating shrimp, salmon and vegetables. Lightly coat hot grill with vegetable oil.
  • Grill skewers approximately 5 minutes per side until shrimp are opaque and vegetables are crisp tender and slightly charred. Remove from heat. Reduce temperature on grill to low or use indirect heat for next step.
  • Brush cooked skewers with sauce. Return to grill and heat both sides about 30 to 60 seconds to sear sauce to food. Remove from skewers and enjoy!

Barbecue Seafood Skewers


Enjoy these takes on BBQ recipes to Feed Your Beast!

Bar-B-Que Beast

#feedyourbeast
  • On the Bay Bar-B-Cue Crab Dip By Hezzi-D’s Books and Cooks
  • Air Fryer Chicken Fingers with BBQ Yogurt dipping sauce By Simple and Savory
  • Bacon-Wrapped BBQ Chicken with BBQ Dipping Sauce By Kate’s Recipe Box
  • Posted in barbecue, bbq, salmon, seafood, shrimp, What's For Dinner? | 16 Comments